How To Root Hydrangea Cuttings Like A Pro
Hydrangeas are beautiful, versatile plants that can add a touch of elegance to any garden. If you're looking to propagate your own hydrangeas, rooting cuttings is a great way to do it. It's a relatively easy process, and with a little care, you'll be able to enjoy your own hydrangea plants in no time.
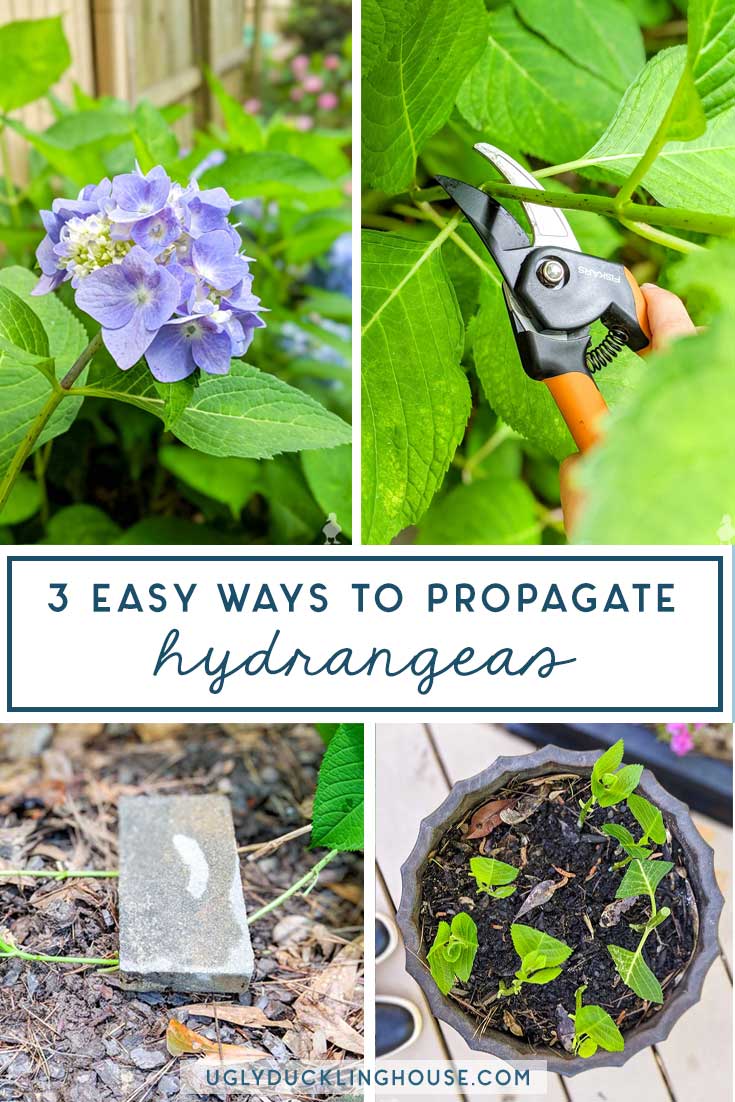
In this blog post, we'll walk you through the steps on how to root hydrangea cuttings like a pro. We'll cover everything from choosing the right cuttings to providing the proper care, so you can be sure your cuttings have the best chance of success.
Choosing the Right Cuttings
The first step to rooting hydrangea cuttings is choosing the right cuttings. You'll want to choose cuttings that are healthy and free of pests or diseases. The cuttings should also be from the current season's growth.
The best time to take hydrangea cuttings is in late summer or early fall. This is when the plant is still actively growing, but the weather is starting to cool down. The cuttings should be about 4-6 inches long, with at least two or three leaf nodes.
Preparing the Cuttings
Once you've chosen your cuttings, you'll need to prepare them for rooting. First, remove the leaves from the bottom two-thirds of the cutting. This will help to reduce water loss and encourage rooting.
Next, dip the cut end of the cutting in rooting hormone. This will help the cutting to root more quickly.
Planting the Cuttings
The next step is to plant the cuttings in a rooting medium. A good rooting medium will be well-draining and sterile. You can use a commercial rooting medium, or you can make your own by mixing equal parts peat moss, perlite, and sand.
When planting the cuttings, make sure to bury the cut end about 1-2 inches deep in the rooting medium. Water the cuttings well, and then place them in a shady location.
Caring for the Cuttings
The most important thing to remember when caring for hydrangea cuttings is to keep them moist. Water the cuttings regularly, and mist them with water if the air is dry.
The cuttings should be kept in a shady location. Avoid placing them in direct sunlight, as this can scorch the leaves.
With proper care, your hydrangea cuttings should start to root within a few weeks. Once the cuttings have rooted, you can transplant them into individual pots or your garden.
Conclusion
Rooting hydrangea cuttings is a great way to propagate these beautiful plants. With a little care, you'll be able to enjoy your own hydrangea plants in no time.
Are you looking to propagate hydrangeas from clippings? If so, you've come to the right place! is a comprehensive resource for everything you need to know about hydrangea clippings, from how to take them to how to care for them.
On , you'll find detailed instructions on how to take hydrangea cuttings, including the best time of year to do so, the type of cutting to take, and how to prepare the cutting for rooting. You'll also find tips on how to care for your hydrangea cuttings, including how to water them, fertilize them, and protect them from pests and diseases.
In addition to its wealth of information, also features beautiful photos of hydrangeas, as well as stories from other gardeners who have successfully propagated hydrangeas from clippings.
So if you're ready to learn more about hydrangea clippings, be sure to visit today!
FAQ of hydrangea clippings
Q: Can I start a hydrangea plant from a clipping?
A: Yes, you can start a hydrangea plant from a clipping. The best time to take hydrangea cuttings is in late summer, when the plant is still actively growing. Choose a healthy, semi-ripe stem that is about 6-8 inches long. Make a clean cut just below a leaf node, and remove the bottom leaves. Dip the cutting in rooting hormone, and plant it in a pot of moist potting mix. Place the pot in a shady spot, and keep the soil moist. In about 6-8 weeks, you should see roots forming. Once the roots are established, you can transplant the hydrangea to a larger pot or to the garden.
Q: When should I take hydrangea cuttings?
A: The best time to take hydrangea cuttings is in late summer, when the plant is still actively growing. This is because the cuttings will have a better chance of rooting if they are taken from a plant that is still in a state of growth. If you take cuttings in the spring or fall, the plant may not have enough energy to support the rooting process.
Q: How do I take hydrangea cuttings?
A: To take hydrangea cuttings, you will need a sharp knife or shears. Choose a healthy, semi-ripe stem that is about 6-8 inches long. Make a clean cut just below a leaf node, and remove the bottom leaves. Dip the cutting in rooting hormone, and plant it in a pot of moist potting mix. Place the pot in a shady spot, and keep the soil moist. In about 6-8 weeks, you should see roots forming. Once the roots are established, you can transplant the hydrangea to a larger pot or to the garden.
Q: How do I care for hydrangea cuttings?
A: The most important thing to remember when caring for hydrangea cuttings is to keep the soil moist. You should also avoid exposing the cuttings to direct sunlight. If you are keeping the cuttings indoors, place them in a bright, indirect light location. Once the cuttings have rooted, you can gradually move them to brighter light conditions.
Q: What are the signs that hydrangea cuttings are rooting?
A: There are a few signs that hydrangea cuttings are rooting. One sign is that the leaves will start to look healthier and more vibrant. Another sign is that the cutting will start to produce new growth. If you see either of these signs, it is a good indication that the cutting is rooting.
Image of hydrangea clippings
Here are 5 different images of "hydrangea clippings" from Pinterest:
- Hydrangea clippings in a jar of water. This image shows a jar of water with several hydrangea clippings in it. The clippings are fresh and green, and they are starting to root.
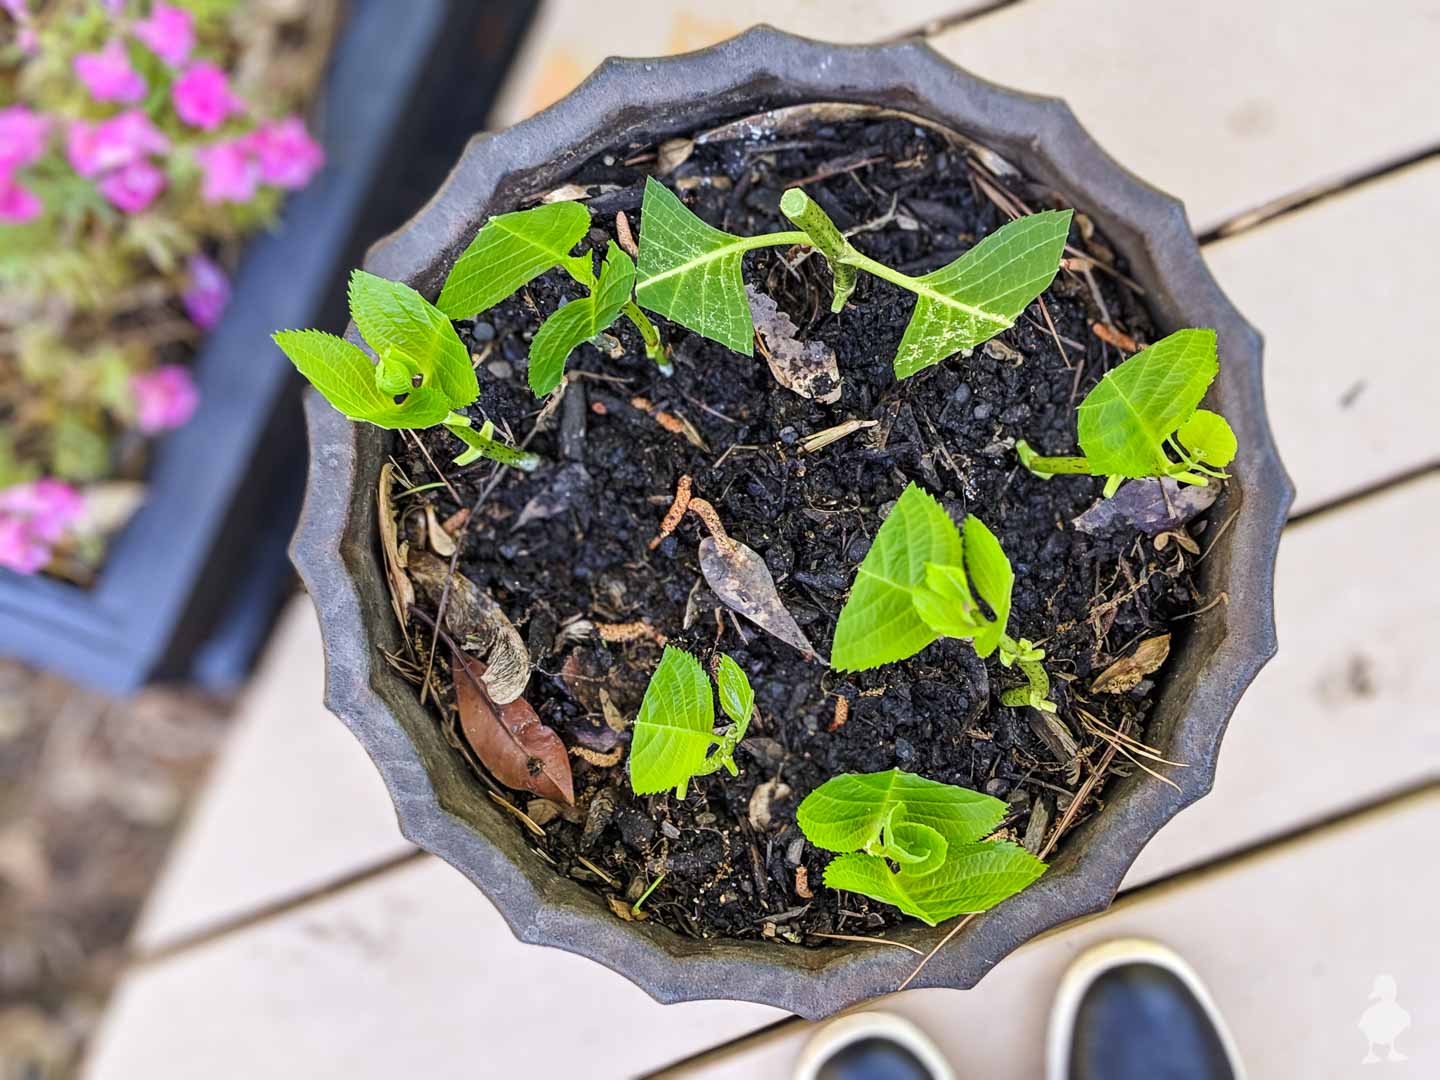
- Hydrangea clippings planted in soil. This image shows a pot of soil with several hydrangea clippings planted in it. The clippings are starting to grow new leaves, and they are looking healthy.
- Hydrangea clippings with roots. This image shows a close-up of hydrangea clippings with roots. The roots are white and healthy, and they are a good sign that the clippings are taking root.
- Hydrangea clippings in a greenhouse. This image shows a greenhouse with several hydrangea clippings growing in it. The clippings are under grow lights, and they are looking healthy and green.
- Hydrangea clippings in a garden. This image shows a garden with several hydrangea clippings planted in it. The clippings are growing well, and they are starting to bloom.
Post a Comment for "How To Root Hydrangea Cuttings Like A Pro"